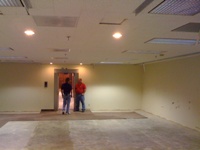
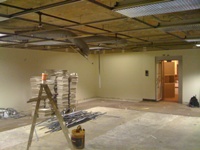
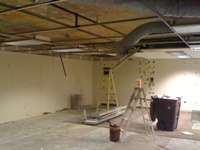
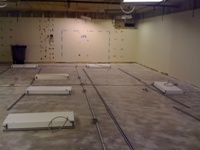
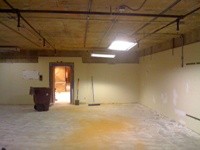
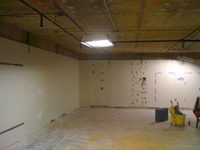
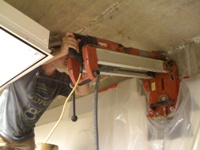
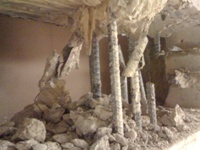
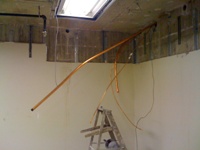
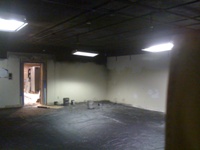
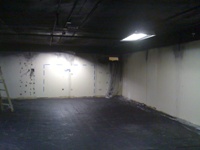
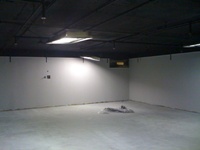
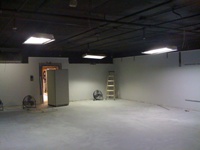
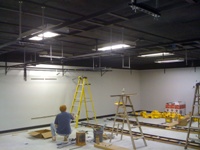
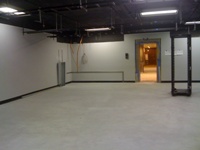
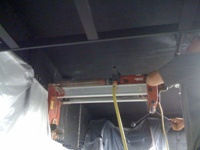
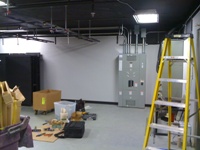
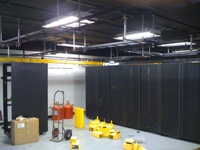
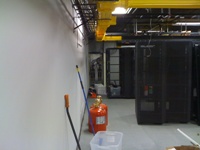
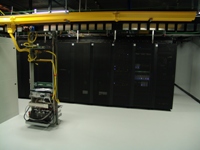
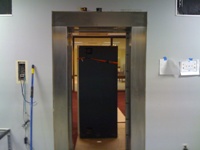
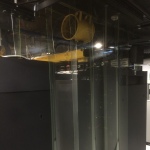
Community clarification: Tyler Vault Datacenter is not affiliated with the proposed West Erwin Street project being called the "Tyler Data Center."

Built in a former bank vault

From retired Class III vault to local datacenter.

Tyler Vault Datacenter began with a retired high-security safety deposit vault and a practical buildout focused on security, power, cooling, fiber, and serviceability.

18 in.vault wall thickness
36+ in.steel and concrete roof
Dec. 2009build completed
Tyler Vault Datacenter rack room with cable ladder and network equipment
Current local infrastructure inside Tyler Vault Datacenter.

Construction story

The original buildout, step by step.

This page keeps the current Tyler Vault descriptions and displays the original project photos in the same clean side-by-side format as the 3rd Floor page.

01 / Cleanout

Stripped down to the bare vault walls

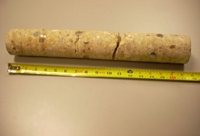
We began with a retired high security Class III safety deposit vault. The first floor of the bank building was poured directly on top of the basement vault, resulting in a vault roof that is in excess of 36 inches thick plate steel and concrete. Before we built, we had to strip it down to the bare walls and take out anything flammable.

Former vault room during early cleanout
Cleanout photo 1
Vault room stripped for datacenter work
Cleanout photo 2
Vault room with ceiling opened for construction
Cleanout photo 3
Vault room before datacenter infrastructure was installed
Cleanout photo 4
02 / Ceiling support

Unistrut and lag bolts through vault material

Because we used Unistrut on the ceiling, we had to place a large number of lag bolts in from below. Necessity being the mother of invention, we built a rig and hooked the hammer drill to it so that this part of the install would run smoother and more efficiently. We shattered several carbide bits in the material that bank vault walls are manufactured with.

Hammer drill rig used for ceiling installation
Unistrut photo 1
Ceiling layout prepared for Unistrut support
Unistrut photo 2
Unistrut supports installed across the vault ceiling
Unistrut photo 3
Lag bolt and support work inside the vault room
Unistrut photo 4
03 / Wall penetrations

Diamond coring through 18-inch steel-reinforced walls

When the vault was built, there was no need to leave holes for power, data, or coolant lines. Therefore, we had to use diamond coring bits to penetrate the walls. These walls are 18 inches thick with four layers of one-inch steel rods in a four-inch mesh pattern. It took three days to drill all the cores, but clearly these thick walls were built for that time buffer.

Diamond core drilling into vault wall
Drilling photo 1
Drilled vault wall opening for infrastructure lines
Drilling photo 2
Concrete and steel core sample from the vault wall
Drilling photo 3
Infrastructure line routed through the vault wall
Drilling photo 4
04 / Floor preparation

Anti-static floor coating

After years of experience fixing servers, we knew the necessity of covering the floor with anti-static paint.

Vault floor prepared with anti-static coating
Floor photo 1
Datacenter room floor after coating preparation
Floor photo 2
Finished floor and wall area after anti-static work
Floor photo 3
Wide view of finished anti-static floor
Floor photo 4
05 / Cable pathways

Ladder racks and ceiling-mounted lights

Since we used Unistrut, it only took two people one day to hang the ladder racks. Here you can see the lights are now mounted directly to the ceiling. This provides better air flow and keeps them away from any data cables.

Ladder rack sections being installed
Ladder rack photo 1
Overhead ladder rack layout inside the datacenter
Ladder rack photo 2
Ceiling-mounted lights and rack supports
Ladder rack photo 3
Completed ladder rack installation area
Ladder rack photo 4
06 / Power

Independent power paths and failover

Locally trained master electricians perfectly configured the data center power supply to include failover between two independent lines entering the building.

Electrical power work during Tyler Vault construction
Power photo 1
Electrical equipment and building power infrastructure
Power photo 2
Power routing work through vault area
Power photo 3
Electrical panels and installation tools in the datacenter room
Power photo 4
07 / Fiber

Fiber trays for outside and rack-to-rack connectivity

We installed fiber trays to support fiber from the outside, as well as rack to rack. The building we are in is the hub for fiber connectivity in the Tyler area. There are multi-path fiber connections from carriers who operate from our data center. If you already have one of our carriers, it is a simple thing to extend your network into our Vault; just let us know of your interest.

Fiber trays and rack area inside Tyler Vault
Fiber tray photo 1
Fiber tray running along datacenter wall
Fiber tray photo 2
Rack aisle with overhead yellow fiber trays
Fiber tray photo 3
Fiber tray and rack-to-rack pathway detail
Fiber tray photo 4
08 / UPS

Moving and installing dual UPS systems

With a two-ton limit on the service elevator, we had to remove all UPS batteries and haul them in separate trips. Because both UPS systems required clearance through sharp corners and doorways, they were moved by the experienced safe moving crew at Locksmith Services of Tyler. Through our dual Powerware systems, each unit in our racks has two plugs for battery redundancy that each sit behind two isolated power sources.

UPS equipment being moved into the building
UPS photo 1
UPS moving through doorway into facility
UPS photo 2
UPS battery modules removed and staged
UPS photo 3
Installed UPS systems in the datacenter area
UPS photo 4
09 / Cooling

Redundant cooling and hot/cold aisle design

Air conditioning was a unique challenge, but Modern Indoor Comfort Zone was up for it. With a mixture of green technology, high-efficiency DX, and chilled water units, we have reliable, redundant, and cost-effective cooling. Using hot and cold aisles, we pull in cold air from outside and then send hot air from servers to heat the building during winter. We get free cooling, and other tenants get free heat.

Cooling equipment installation work
Cooling photo 1
Outdoor cooling unit installed for datacenter HVAC
Cooling photo 2
Mechanical room cooling and chilled water infrastructure
Cooling photo 3
Hot and cold aisle airflow containment
Cooling photo 4

Local infrastructure built for Reliability.

TThe original project began on October 29, 2009, and was completed on December 9, 2009. Since then, Tyler Vault has provided the Tyler area with local datacenter, connectivity, and support services. After this router was removed from active service, we kept it powered on as a historical marker and demonstration that Tyler Vault has maintained continuous power since the day we opened. .

Cisco uptime screen showing long-term equipment uptime
Long-term uptime from Tyler Vault infrastructure.